DOORS Classic provides support for OSLC via DOORS Web Access. It is a product for which we would like to provide official support. However, we await the resolution of two issues with their product (reported to IBM in the Spring of 2023) to announce official support. These issues are:
-
Previews from DOORS Classic Client and Jira do not present Jira content because IBM is using server-to-server authentication keys (OAuth) instead of client-to-server authentication keys (JSessionID).
-
DOORS Classic Client does not apply the size guidance from the Jira Service Provider to the selection and creation dialogs. As a result, the buttons for selection and creation do not appear, forcing users to adjust the window size manually.
If users can manage these two constraints, then the operation from Jira to DOORS is fully operational. To use these features, follow the following guide.
Installation Requirements
The latest DOORS Client release is required. The WebView2 component is in the prerequisites. This component triggers the change to using Edge rather than Internet Explorer in your DOORS Client. In addition, you must have DWA installed and configured.
https://www.ibm.com/support/pages/node/7116571#INSTALL
Configuring Repositories
The basic steps are similar to what we do with DOORS Next → https://www.youtube.com/watch?v=hwKh0hn1jKg&list=PLSW-q842dhtY2WE7M53BePWac5mCRCe_u&index=2&t=283s&pp=iAQB .
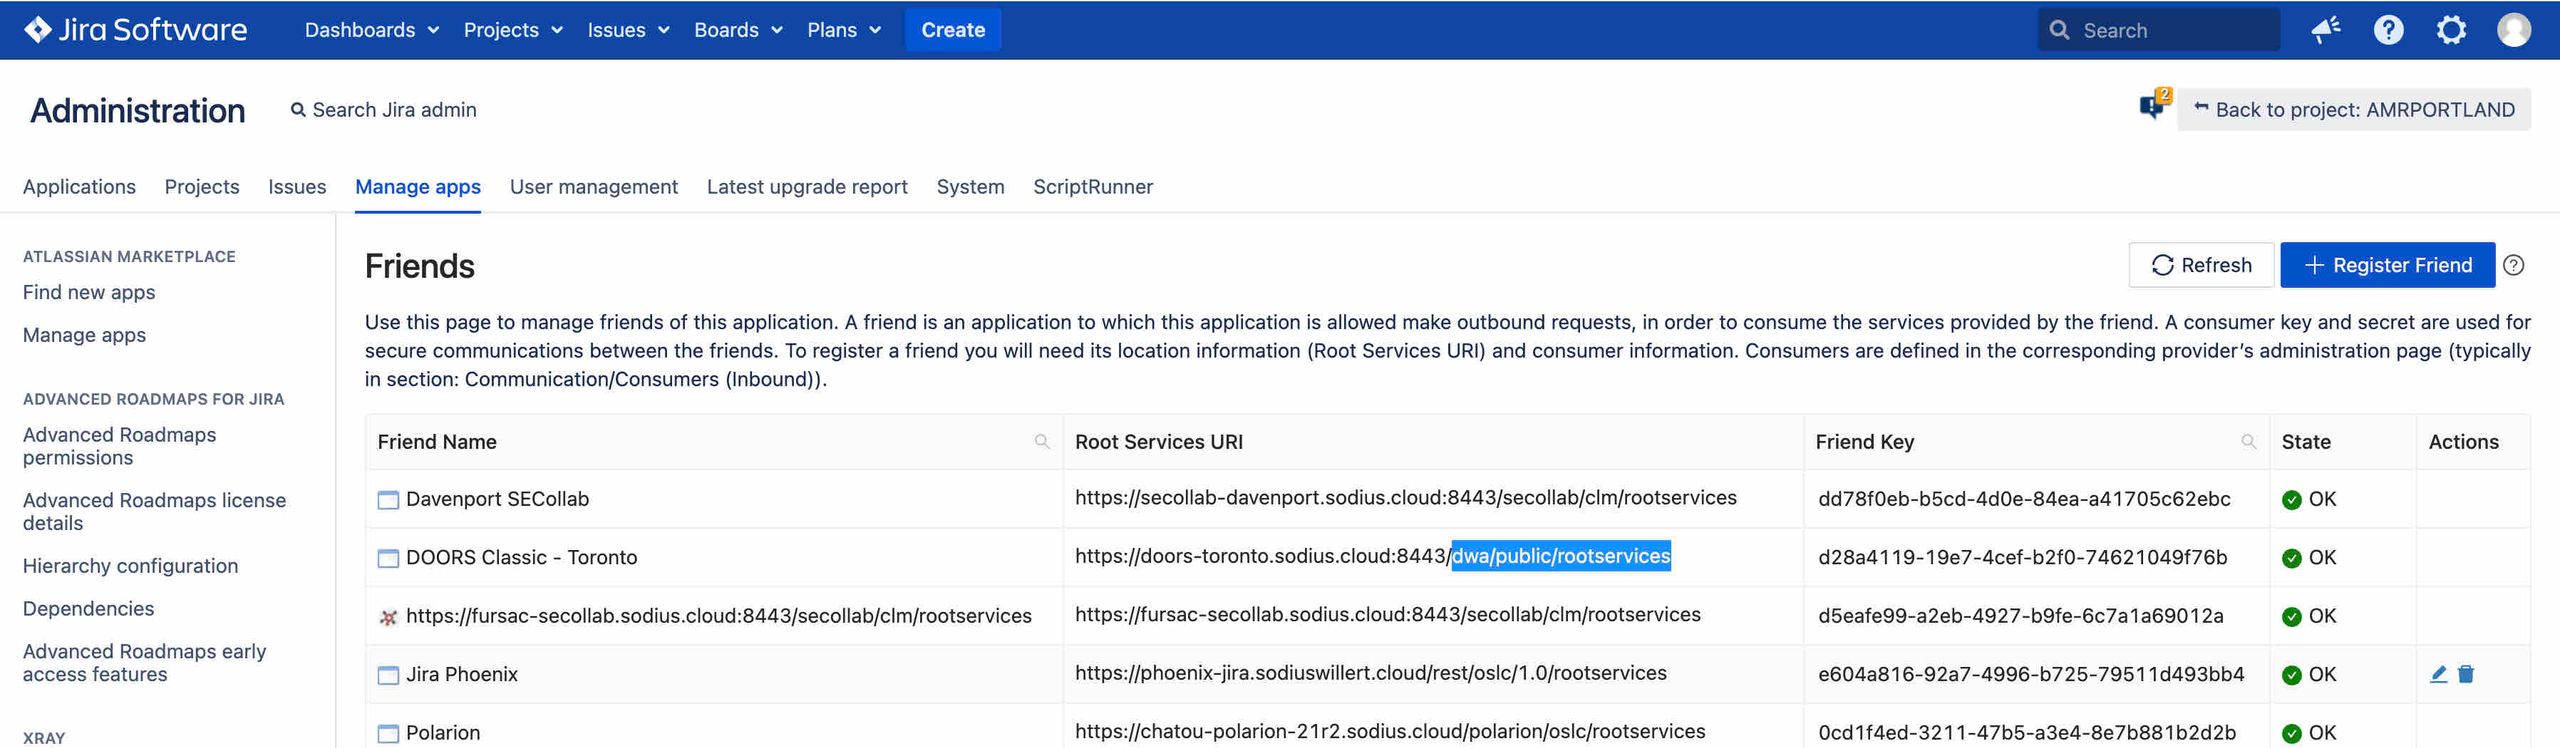
You will create a Friend from Jira to DOORS using the OSLC Connect Friends page. Register a Friend and use the DWA rootservices location (usually https://yourdoorsserver/dwa/public/rootservices).
In your DOORS Client you will need to approve this Friend.
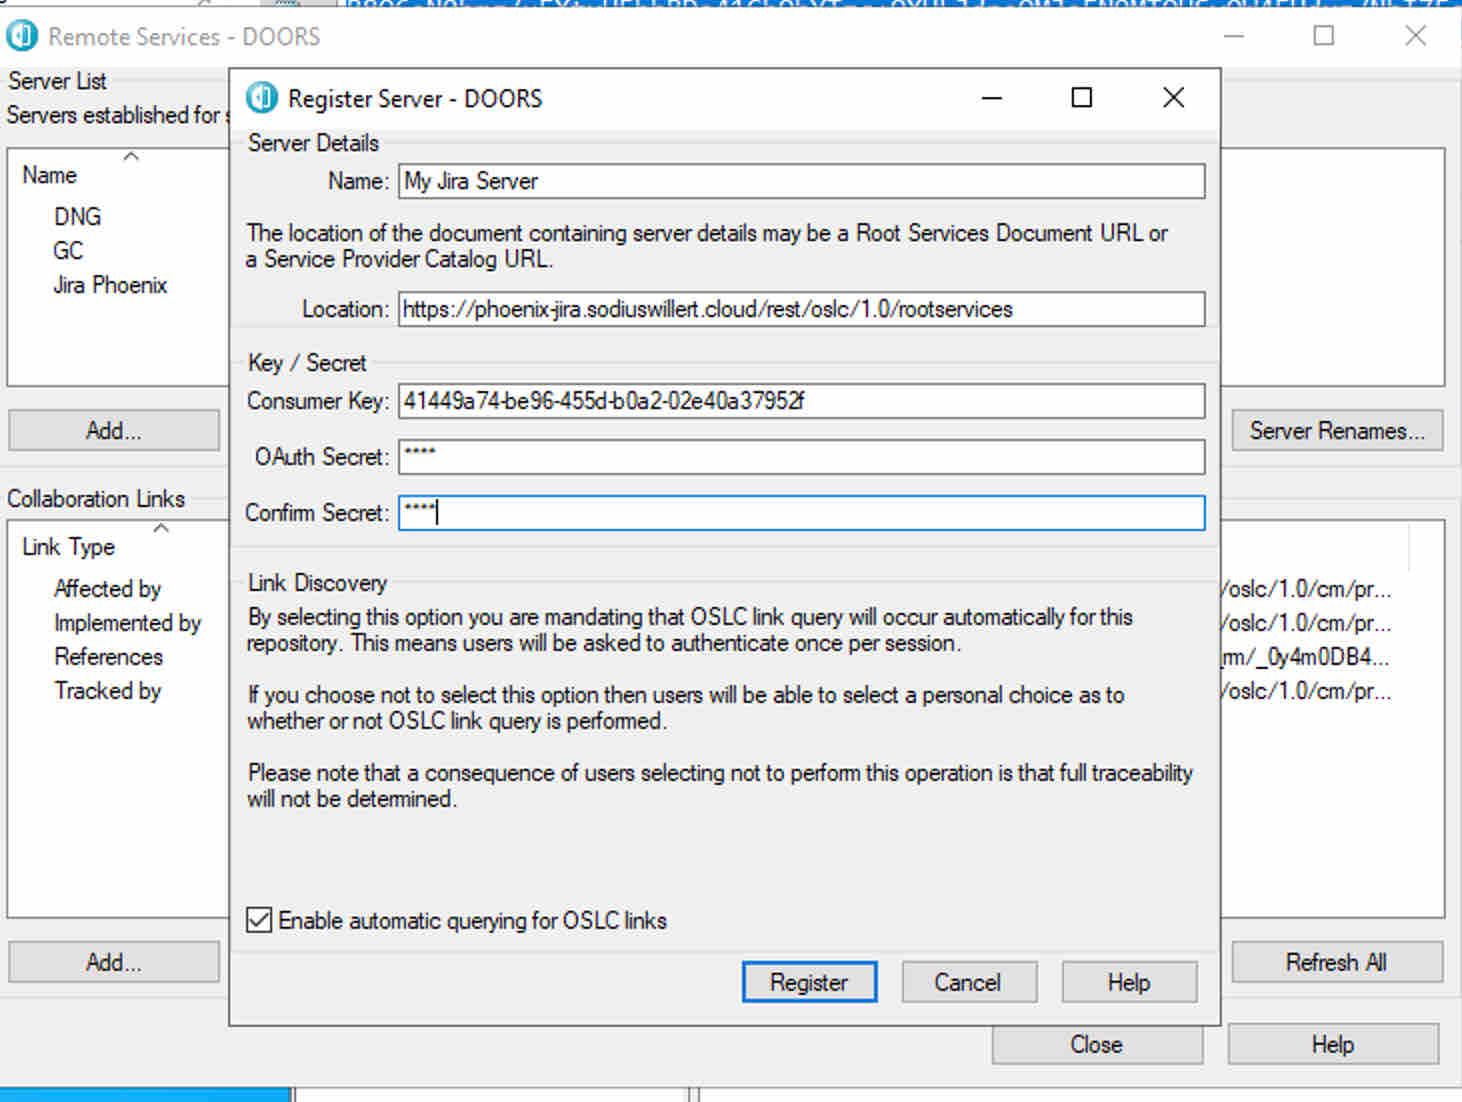
Files → OSLC → Local Keys
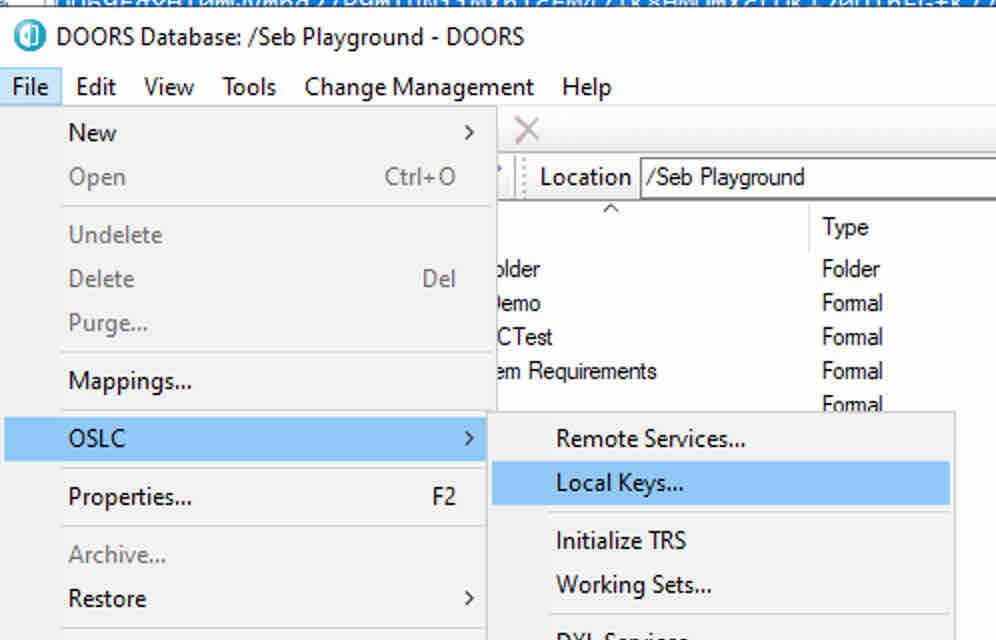
Mark your Friend as “approved.” This allows project associations and linking from Jira to DOORS.
Then, we need to do the inverse. We need to create a friend from the DOORS client for Jira.
In Jira, go to the consumer page and add a new Consumer …
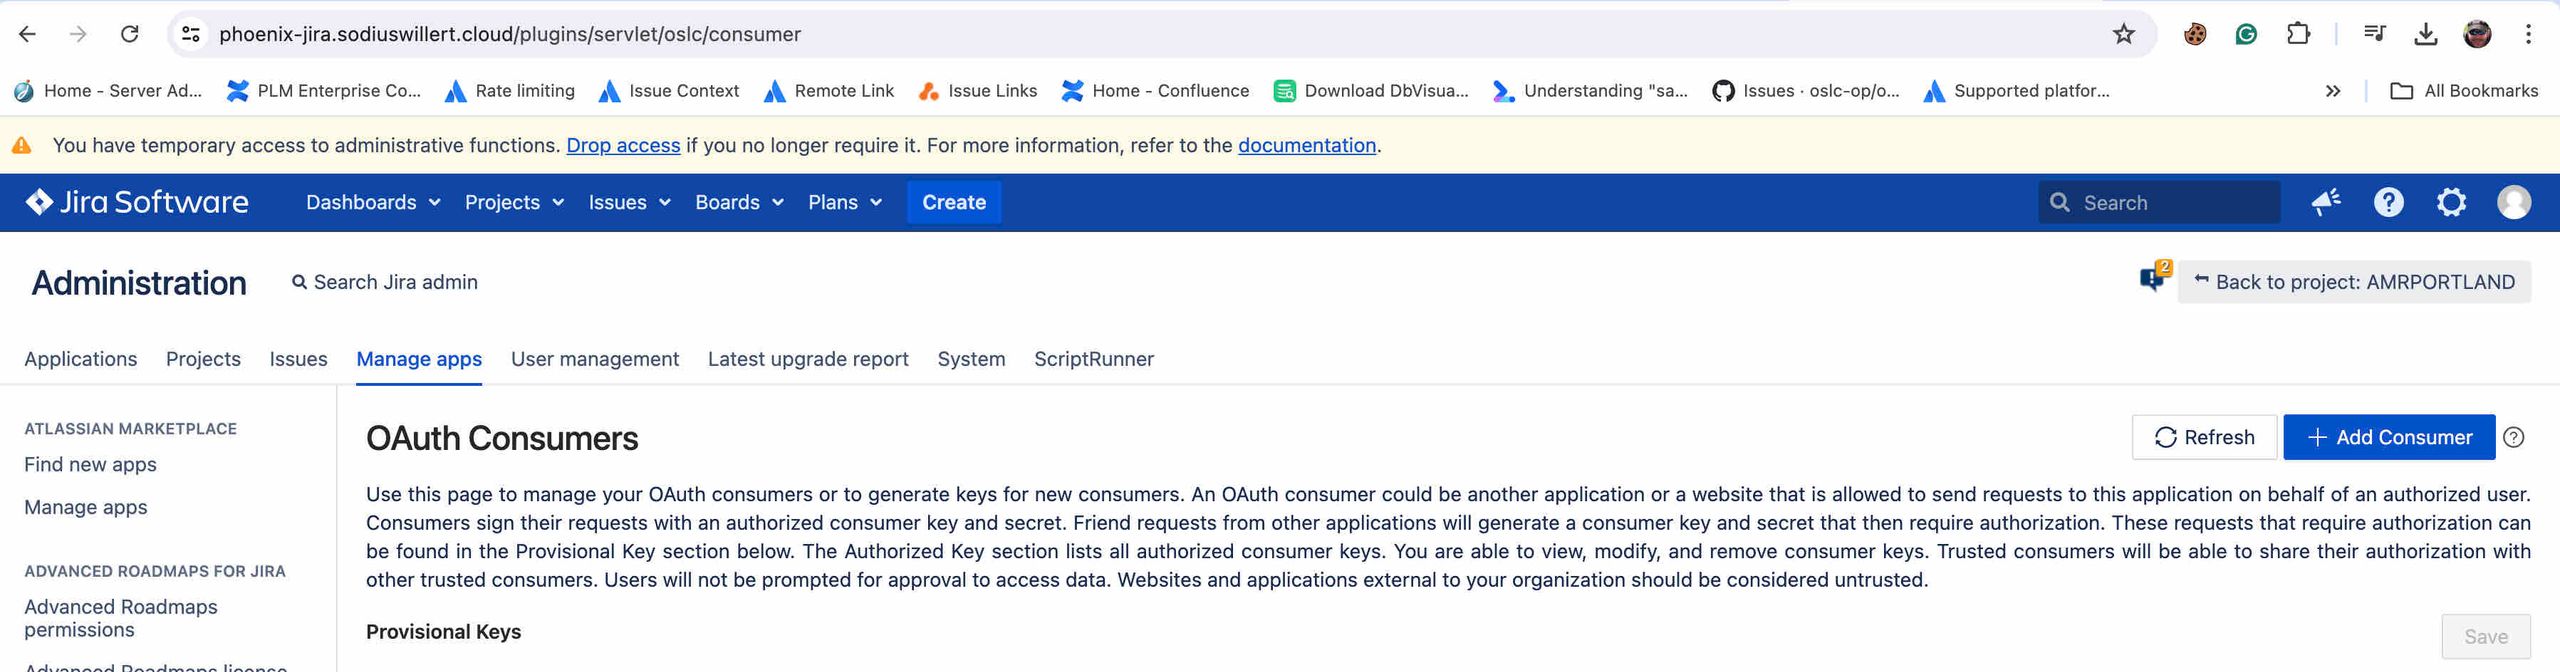
And then fill in the form. You will need to remember the secret.
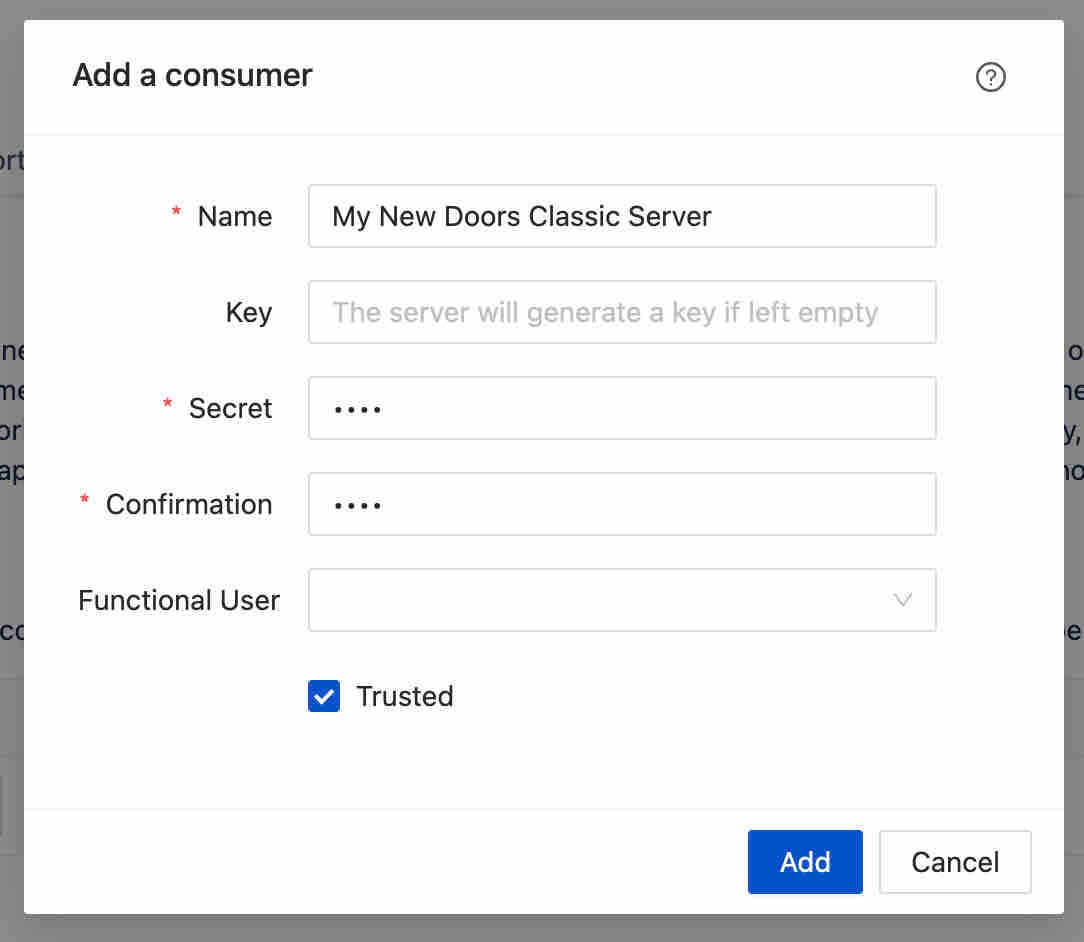
You will now also need the generated key. You will see that after you add the consumer.

Also, scroll down to the bottom of the page and see the rootservices location … you can use the copy button as you will need it in the DOORS Client.

So now we do Files → Remote Services …
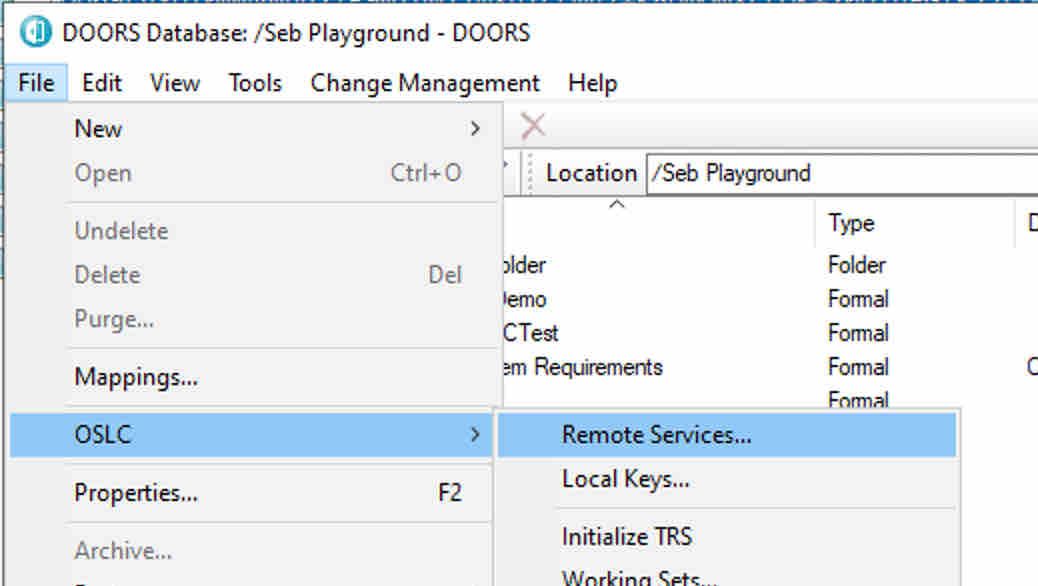
And we add a new Friend with those details from Jira.
It will have you authenticate to Jira and then you have a successful Friend.
You will then want to enable which Jira projects and link types you want to support. This is the bottom of this screen of Adding Collaboration links.
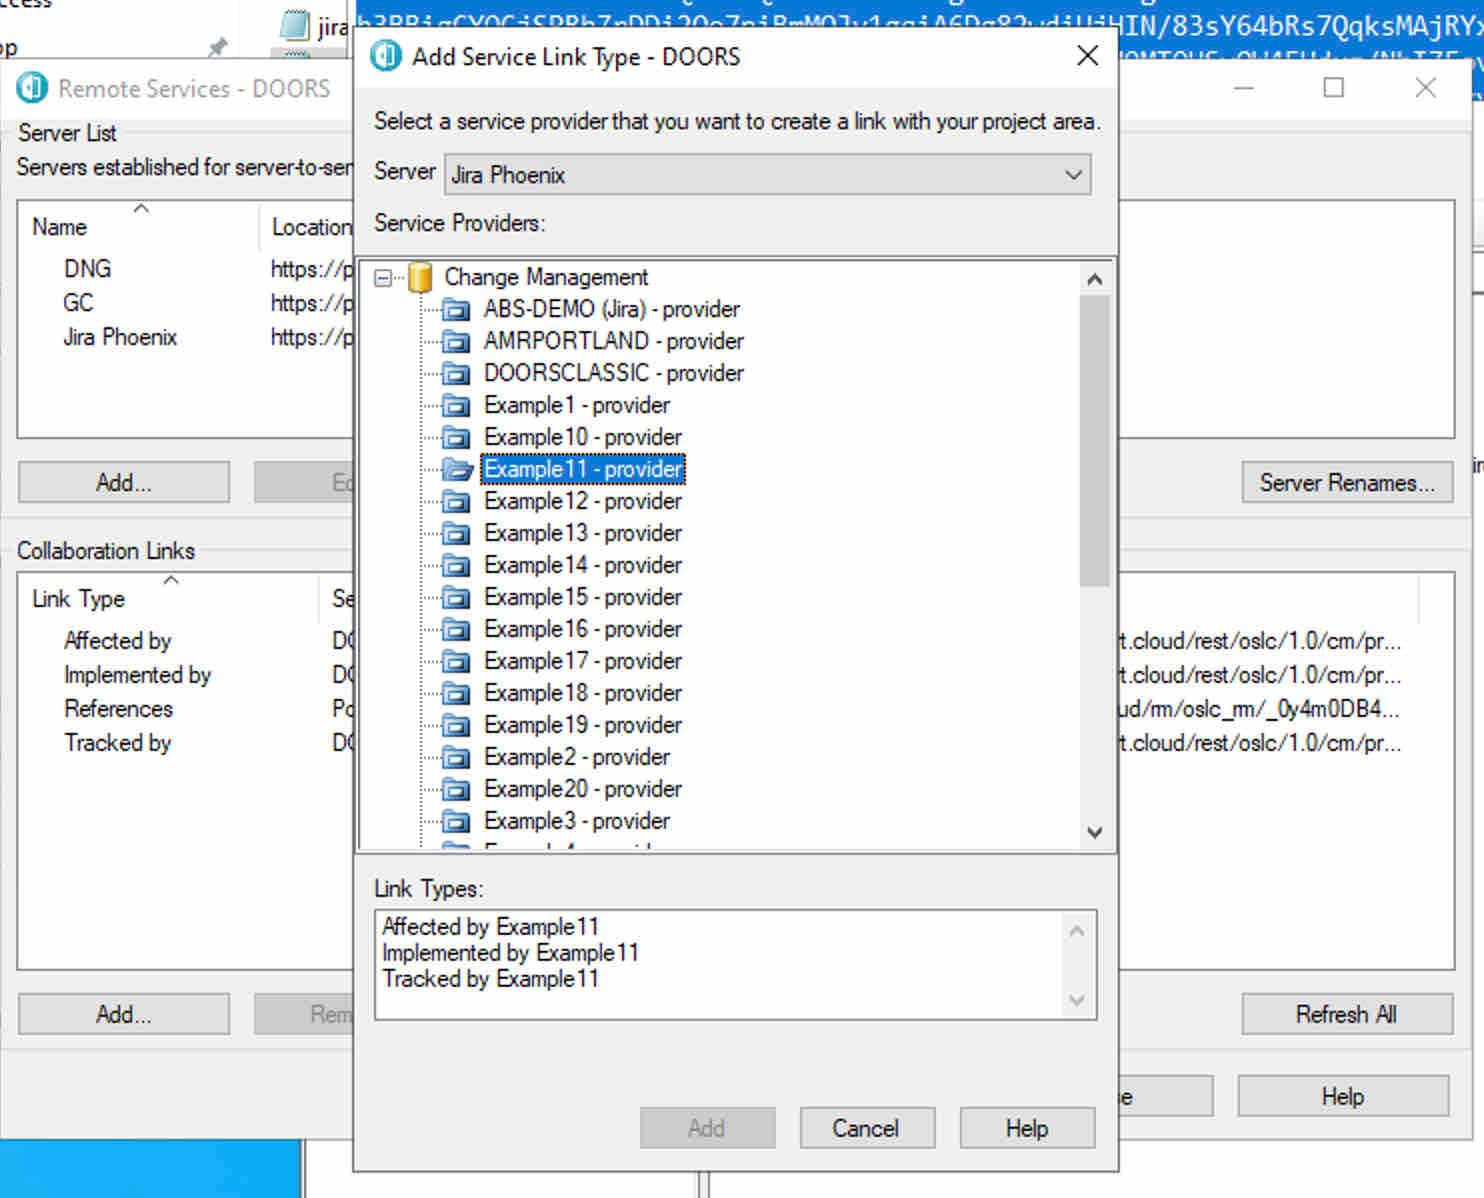
Pick the Jira projects and link types you want to relate to from DOORS.
This completes the basic link options from DOORS.
Back in Jira you will want to enable the OSLC connections on a per project basis. In the Project settings you have some OSLC options including, Project Associations.
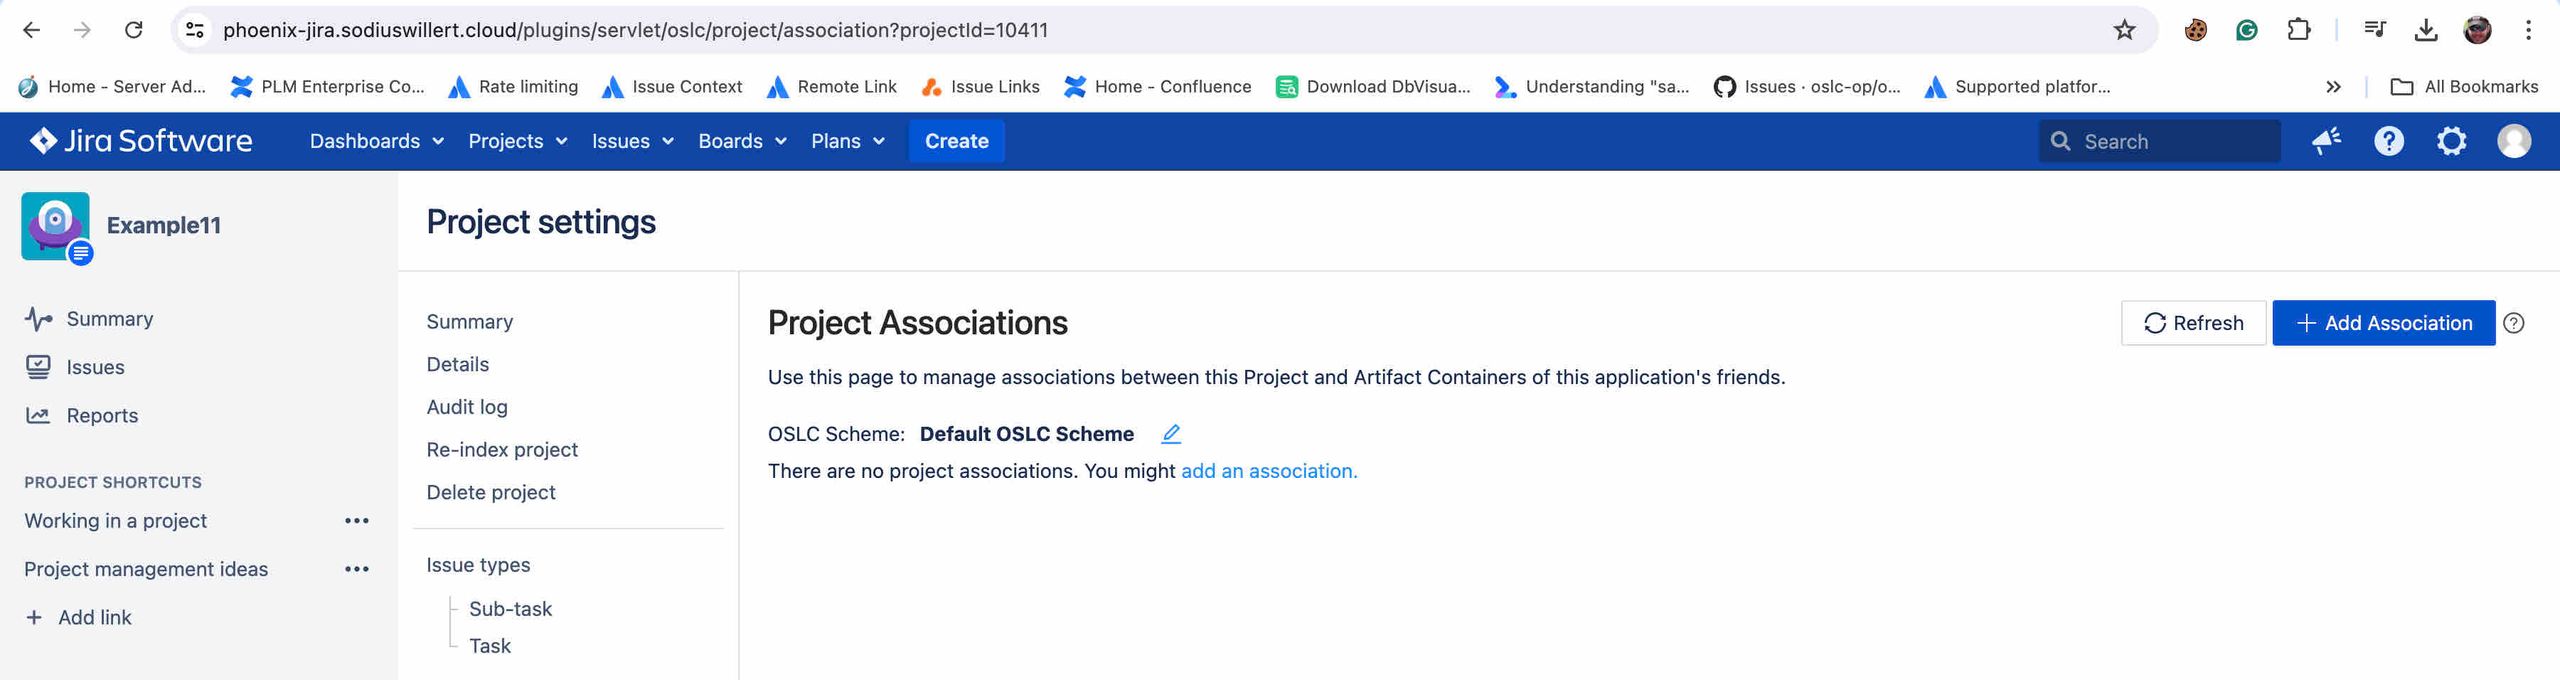
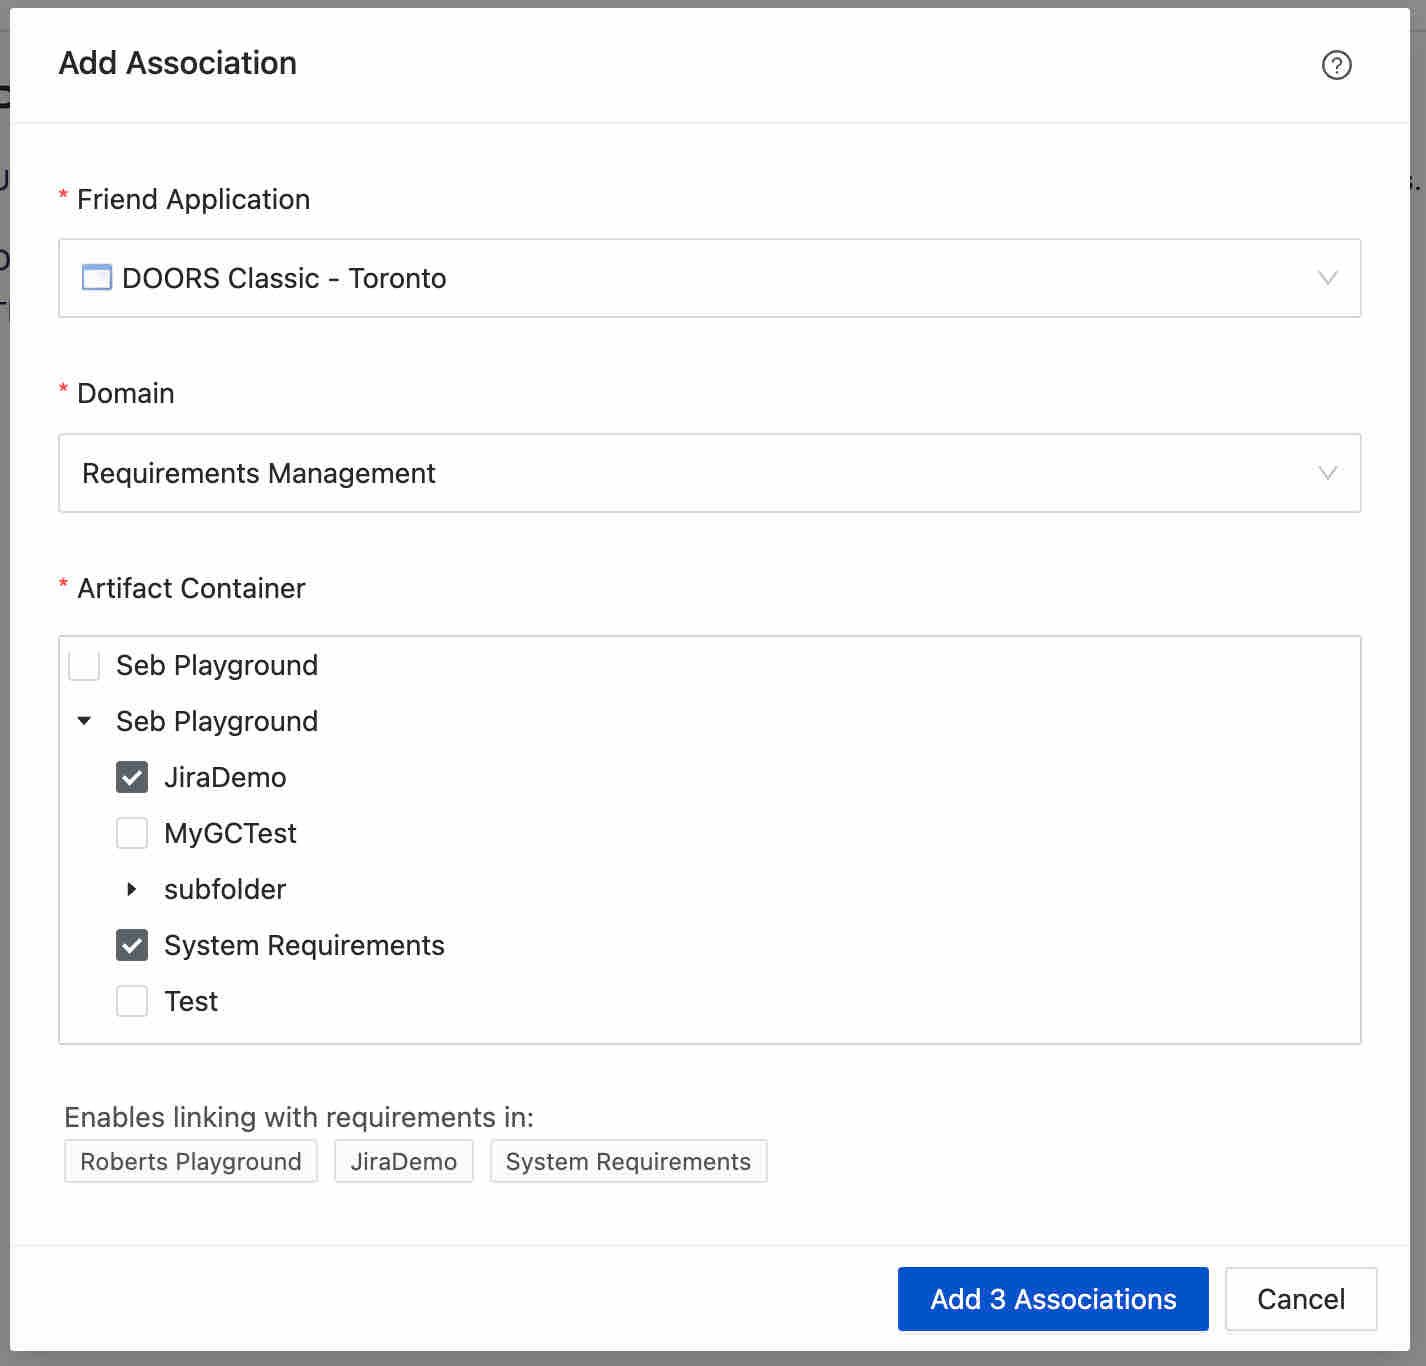
Add new associations to enable creating links from Jira to DOORS Classic.
You can pick Folders or Modules to create the associations.
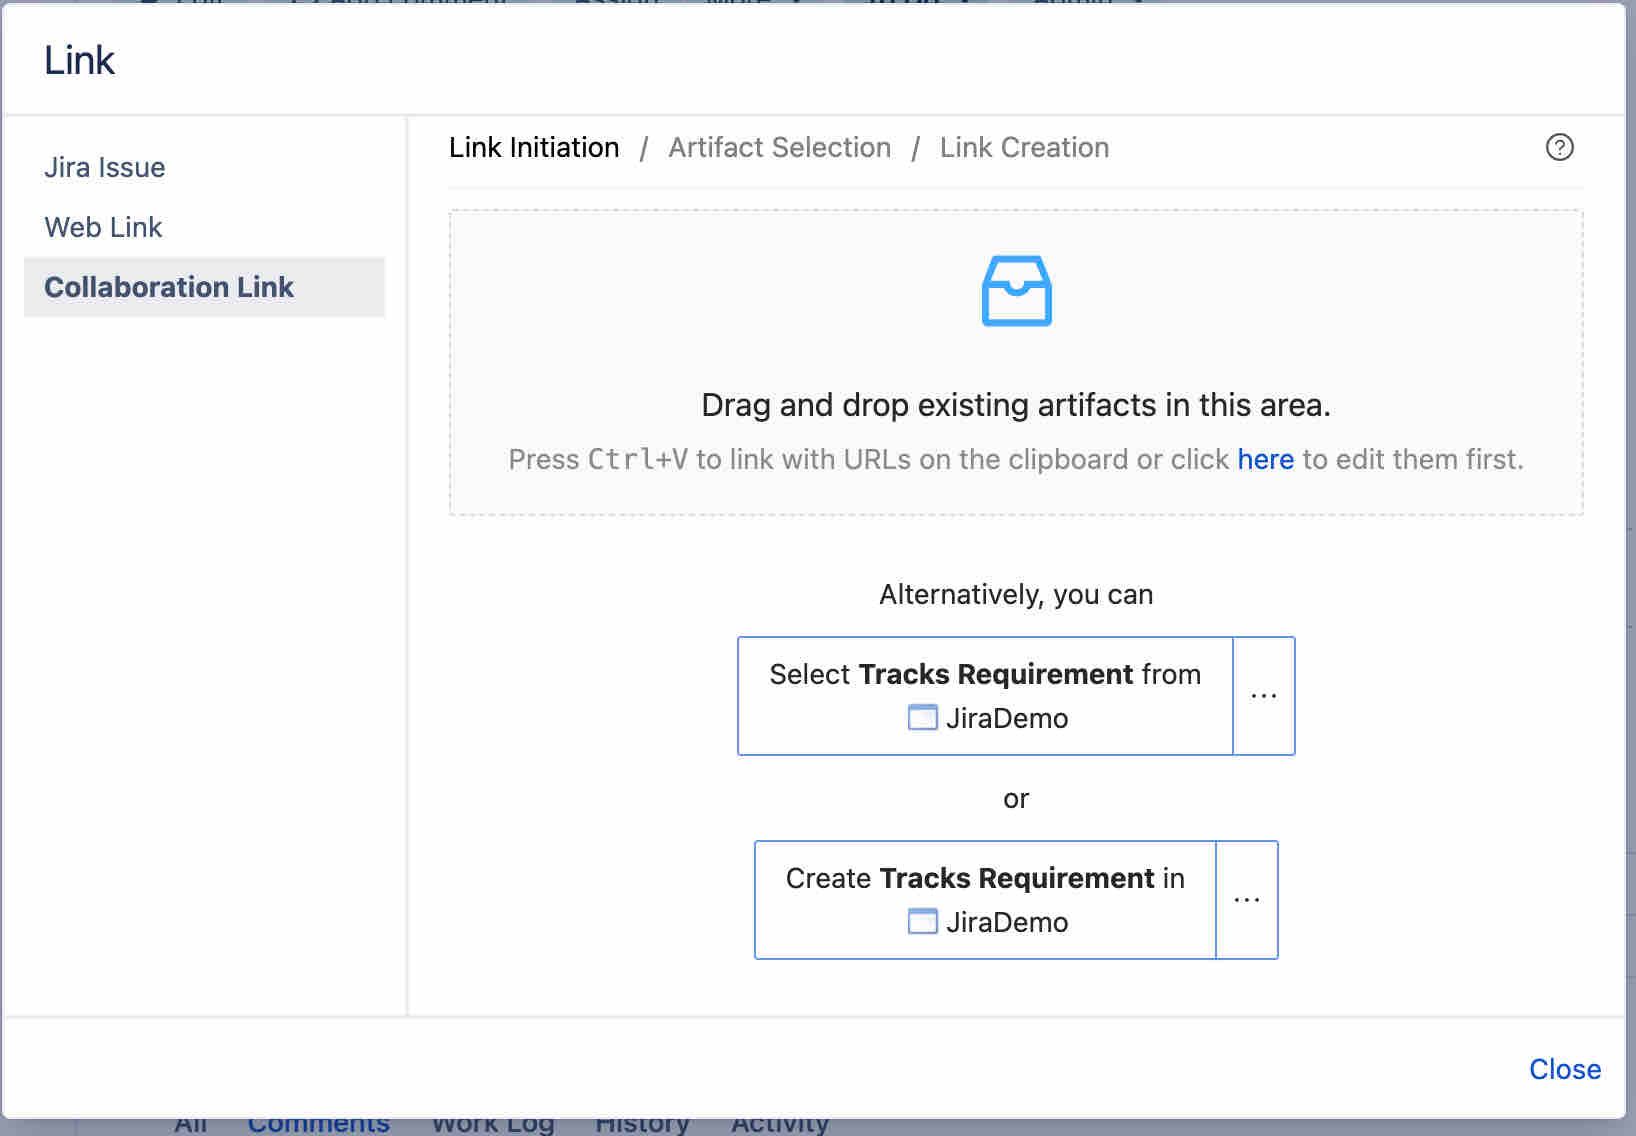
Now, on a Jira issue, you can perform More → Link …
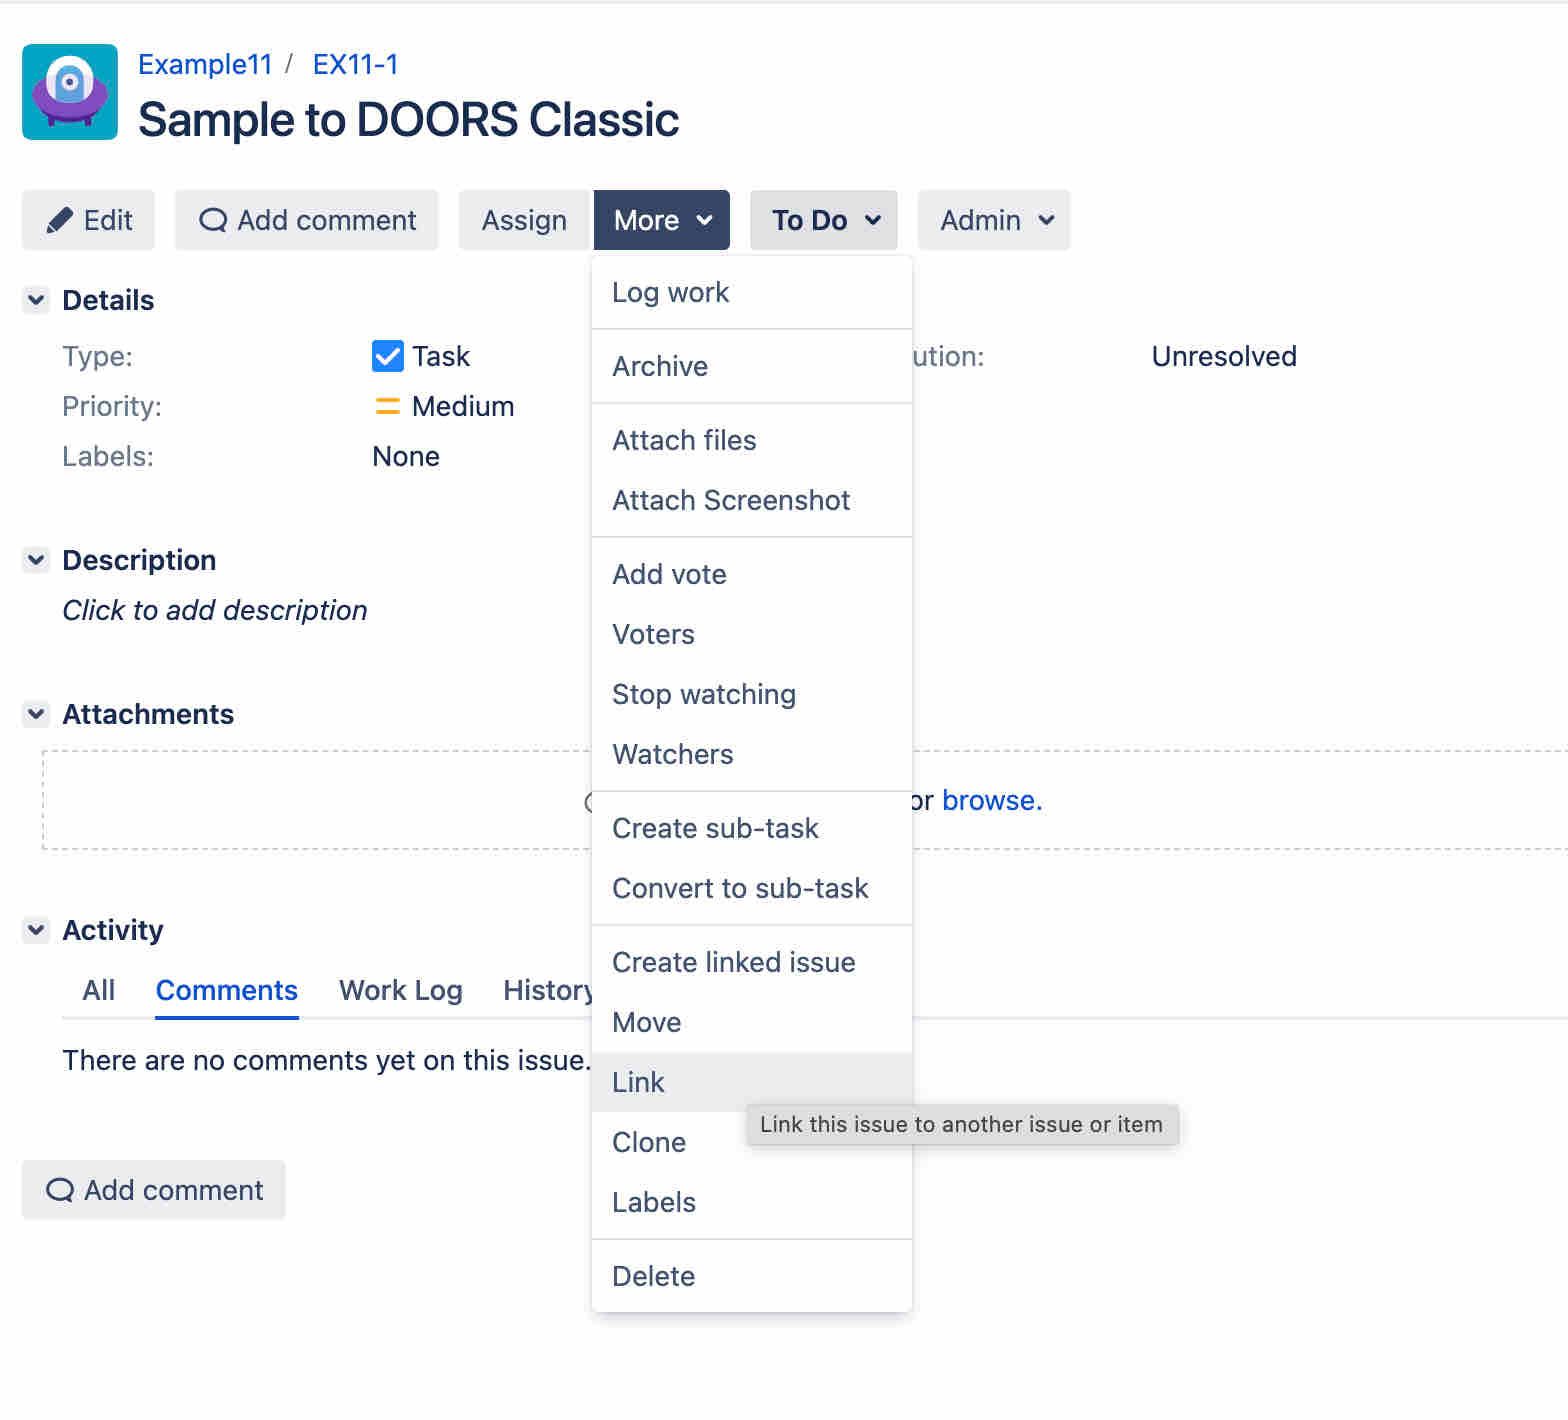
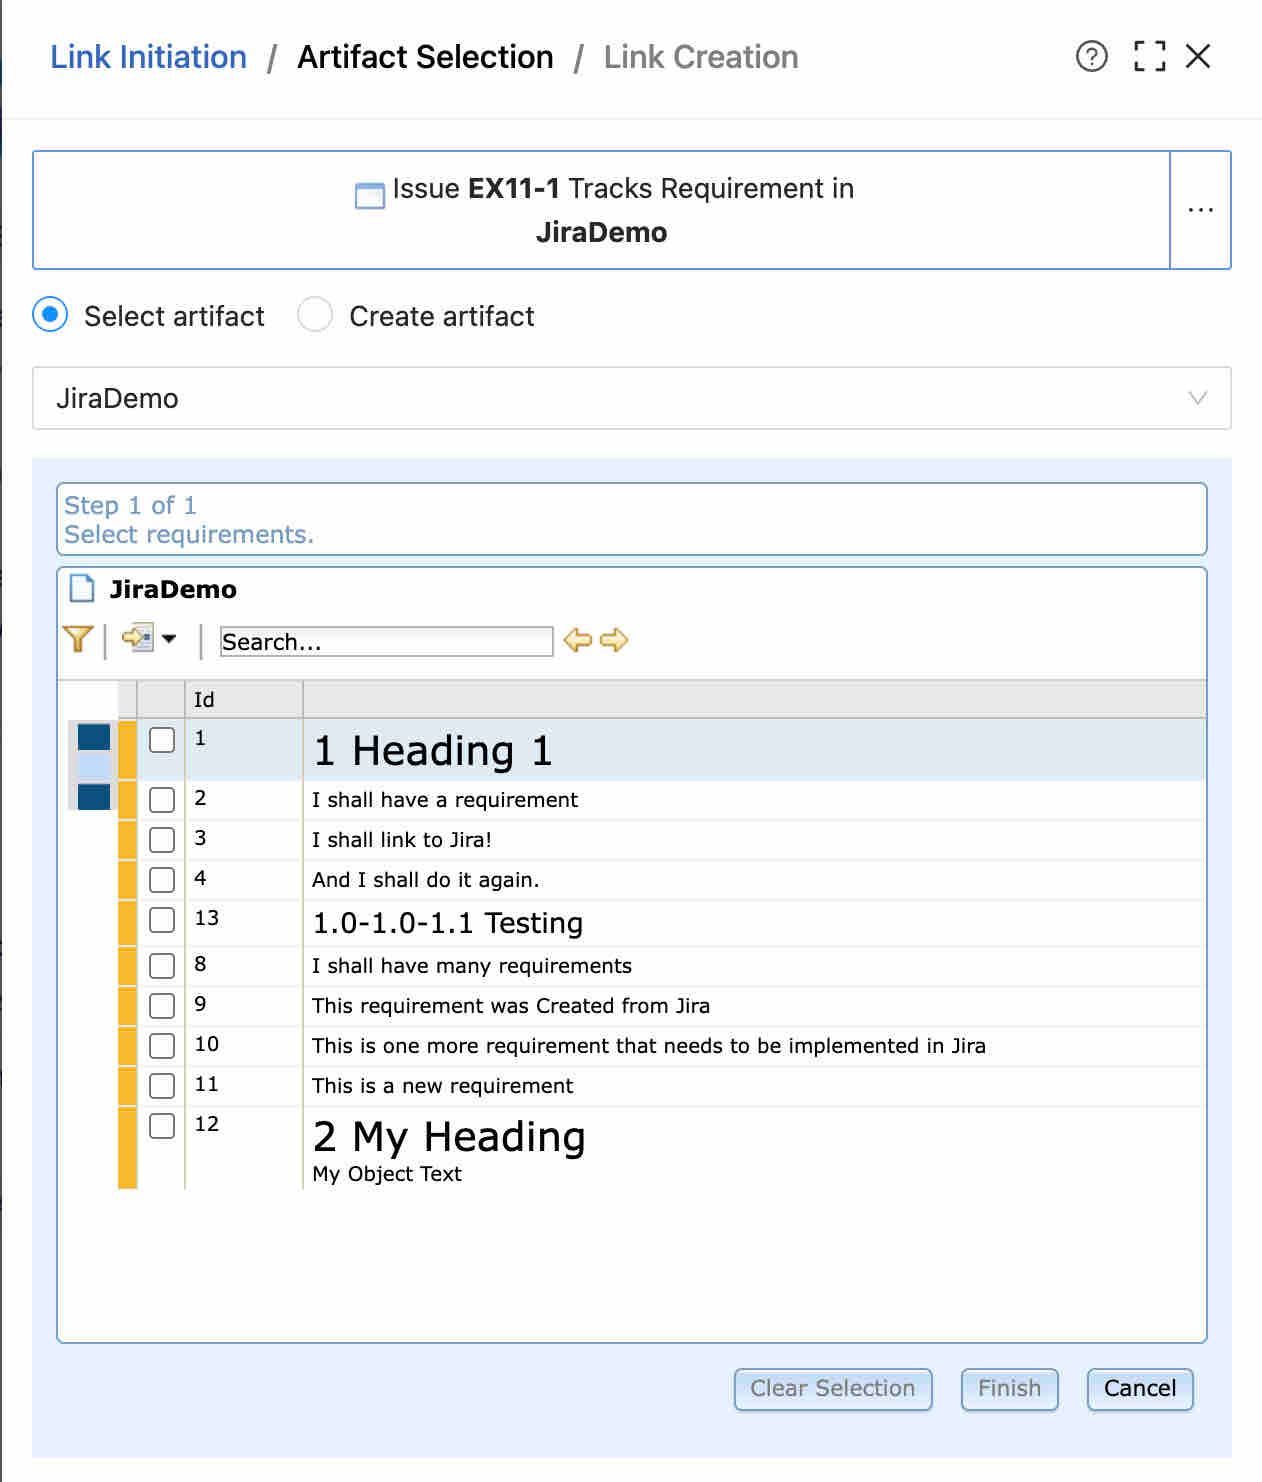
Pick Collaboration Link … And you will see the link associations and containers …
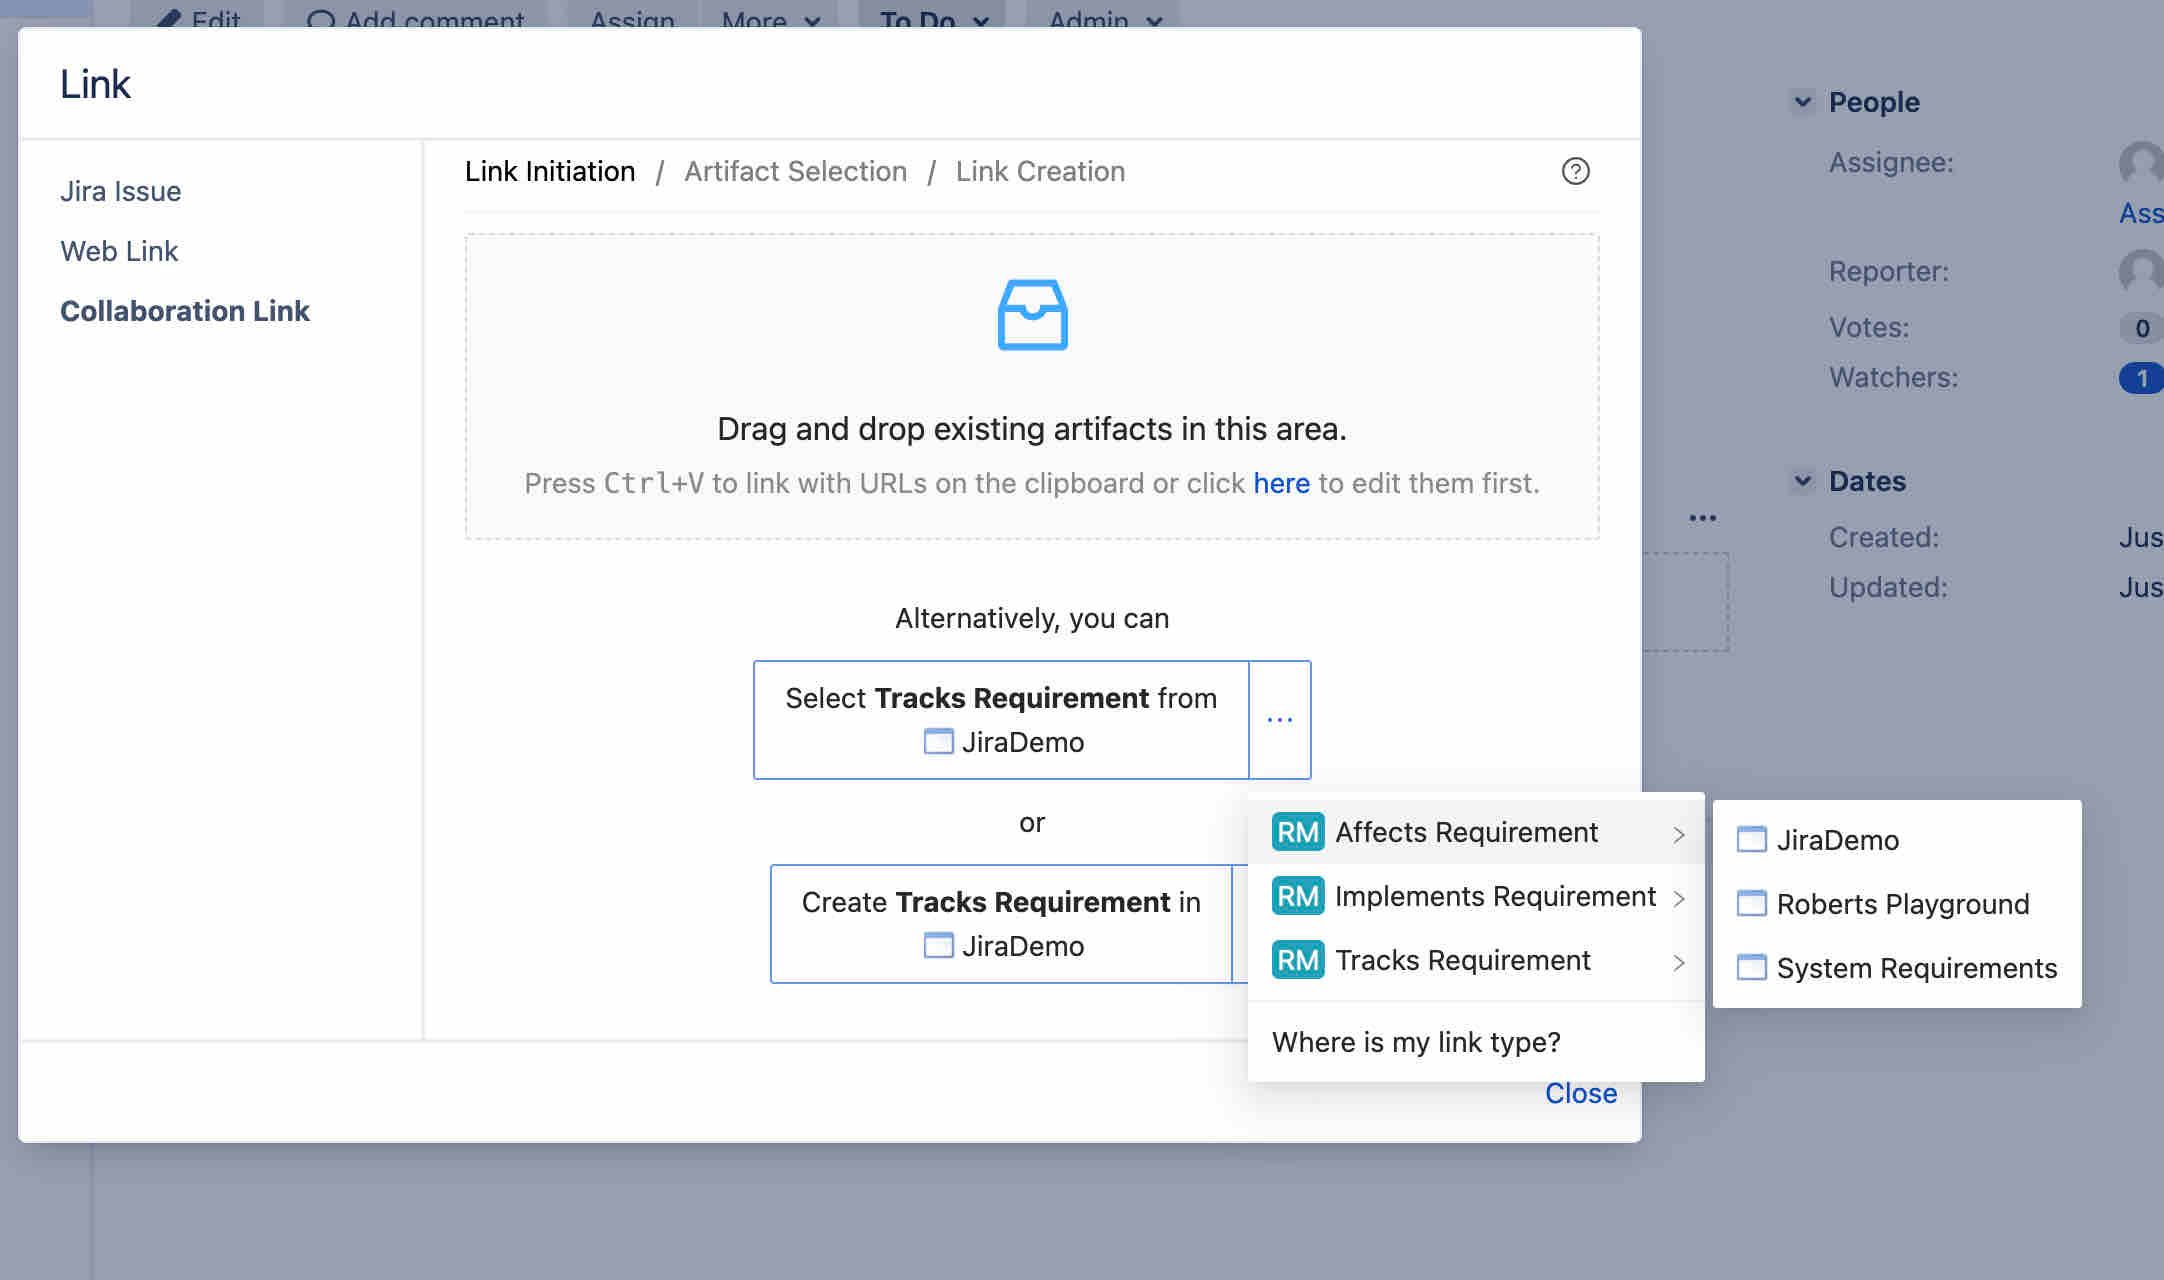
You can now pick requirements and create links (be patient … DWA can be very slow).
You now have DOORS links in Jira.
We recommend the “drag and drop” method from the DOORS Client for faster linking. Dragging DOORS requirements from the client into your Jira page in the Drop Zone.